Showing posts with label Vehicles. Show all posts

Sunday, December 3, 2017

I Repaired My Car Window with Duct Tape (and It's OK)

I Repaired My Car Window with Duct Tape (and It's OK)


Broken car window held closed with duct tape

A funny thing happened last summer.  The rear driver side window in my car wouldn't roll up.  It was having some intermittent problems with the electric motor going up and down and would sometimes get stuck for a few minutes until it would move again.  Finally it stopped moving altogether.  Pushing the window up into the closed position didn't work.  The window would just slide about half way open and would not stay closed.

It would have been more convenient if the window would have stopped working in the closed position instead of the open position.  If the window had stuck in the closed position, I could have ignored it.  But with the window open, rain would come in and cause further damage.  Plus wind noise at highway speed is pretty loud with the window half way down all the time.  Clearly I would need to do something about the window not being able to close.

I thought about taking my car in to a shop to have the window repaired, but I have heard horror stories about bills of hundreds of dollars for repairing electric car windows.  Coming up with that kind of money was not going to work.  But I had duct tape.  Not every problem can be solved with duct tape - or at least that is what my wife tells me.  But I decided this was just the kind of problem that called for duct tape.

I didn't want my car to look too junky with duct tape all over since I drive it to work.  So I decided to tape the window closed from the inside with duct tape, and trim the tape neatly to make it less obvious that the window is taped closed.

Minimizing the amount of duct tape is a security enhancement too, since the window could be pried open from outside, and using a lot of duct tape would call attention to that fact.  From outside the car, the small amount of duct tape is barely visible.

Duct tape was a better solution than glue for keeping the window closed since the duct tape can be removed easily.  If I find either the money to have the window repaired, or the time to figure out how to repair it myself with salvaged parts, I will be able to remove the duct tape fairly easily.

I added a finishing touch to the project by placing some painter's tape over the window switch in the back seat.  This serves as a reminder not to try to move the window with the switch since it is taped closed.

Painter's tape over window switch

The duct tape has been holding for over 6 months now without any problems.  As you can see in the first photo, I used some silver duct tape and some extra-strong "gorilla" black duct tape to keep the window closed.

Project time: Less than one hour.
Project cost: About $1.
Savings: Probably a few hundred dollars by using duct tape instead of repairing the electric window.


Copyright © 2017 by Dr. Penny Pincher.  All Rights Reserved.  Privacy Policy

Saturday, July 22, 2017

DIY Rear View Mirror Replacement


Today as my son was pulling out of the driveway, his rear view mirror fell off!


My Rear View Mirror Fell Off!  How Can I Fix It?
My Rear View Mirror Fell Off!  How Can I Fix It?


This is the same 13 year old Toyota Matrix that just underwent a door check strap replacement (details on how I saved $160 by doing this repair myself are in my post from last week).

So now, I had an opportunity to learn how to replace a rear view mirror that has fallen off.

The key to success is to remove the "button" from the rear view mirror assembly.  The "button" is a flat metal part that is attached with adhesive to the windshield.

The general procedure to re-attach a rear view mirror is:
  1. Remove the "button" from the mirror assembly.
  2. Using a razor blade, carefully remove the old adhesive from the windshield and the "button"
  3. Clean the windshield where the "button" will be attached
  4. Apply the activator to both the windshield and "button" and wait 5 minutes
  5. Apply a drop of adhesive to the "button" and press it in place against the windshield for 1 minute
  6. Wait at least 15 minutes for the adhesive to cure, then reattach the rear view mirror


Here are the tools and materials you'll need:
  • Screw driver to remove rear view mirror from "button".  Mine had a screw that took a star driver to remove.
  • Razor blade to remove old adhesive from "button" and windshield
  • Glass cleaner and paper towel or rag to clean windshield
  • Gloves to wear when applying the adhesive
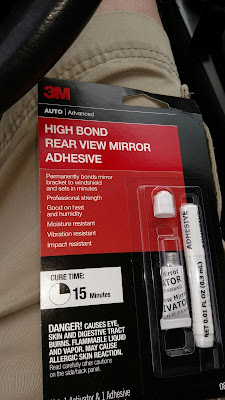
  • And of course you'll need rear view mirror adhesive, I used a product from 3M that cost under $10, see picture below.


Rear View Mirror Adhesive
You can get rear view mirror adhesive at a car parts store or order it from Amazon.

3M 08749 High Bond Rearview Mirror Adhesive - 0.02 fl. oz.

The set includes a tube of activator and a tube of adhesive that are designed to attach the rear view mirror to the windshield.


Here is what the rear view mirror "button" looks like:

Rear View Mirror "Button"

The button is a flat piece of metal that is glued on to the windshield.  The rear view mirror assembly has an opening that fits the shape of the button.  It very difficult to re-attach the rear view mirror without removing the button.  You'll want to remove the button, re-attach that to the windshield, and then hang the rear view mirror assembly back in place.


Rear View Mirror Button Back In Place
The photo above shows the rear view mirror button back in place after scraping the old adhesive off, cleaning the windshield, applying activator, and applying adhesive and pressing the button back in place.

Next, wait at least 15 minutes for the adhesive to cure.

Finally, hang the rear view mirror assembly in place on the button and attach it with a set screw to hold it in place.

Hanging the Rear View Mirror on the Button

With the rear view mirror attached again, the car was ready to drive.  This repair took about 30 minutes and was pretty easy to do.  I don't know how much a body shop would charge for this, but I would guess around $50.

Stay tuned to see what breaks next on the old Toyota Matrix...


Copyright © 2017 by Dr. Penny Pincher.  All Rights Reserved.  Privacy Policy
Saturday, July 15, 2017

Saving $160 on a Simple Car Repair

How I Saved $160:  DIY Replacement Car Door Stop Strap


The Broken Car Door Check Strap...

The other day, we were saying goodbye to my teenage son in the driveway.  His suitcases were in the back, and he was heading out on his first real road trip, a 100 mile drive to a summer camp.  As he was closing his car door, something snapped on the driver's side of the 13 year old Toyota Matrix.

A small hinge in the middle of his car door had broken in half.  The door would now swing wide open, more than 90 degrees, but the door still seemed to close securely.  We didn't investigate this much at the time since he had to go to make it to his summer camp opening events on time.

After he returned, I took the Toyota with the broken door check strap to the shop and asked if they could repair it.  They could, but the cost would be $225.

I asked if they meant $2.25, but no-- the estimate was actually for over $200 to replace the little hinge in the middle of the door.  They said the part is specific to this model of car and is quite expensive.  This seemed like way too much, so I declined.

I checked out some videos on YouTube on how to replace this part.  It was held in place by 3 bolts, one in the frame of the door, and 2 more to hold the other side of the hinge in the door itself.  The only tricky part is that you have to remove a couple of screws and pop the door panel off of the metal part of the door.  I always worry that I won't be able to put something like this back together, but I decided that it would be worth the trouble if I could save more than about $50 by doing the repair myself.

My next move was to look for this part myself.  I could get a brand new part for this model of car for $90 from a car parts store.  This is still expensive, but better than $225.

Next, I decided to look at junk yards for a salvaged part.  I didn't think the door check strap needed to be brand new since no other part on the 13 year old car was new.  Plus, I had never seen this part break on a car before, so I thought a used one would be fine if the price was better.

I started calling junk yards and salvage yards.  The first two I called did not have this part.  It was often included with the door, and I didn't want to buy an entire door assembly to get the part.  I tried a third junk yard-- they didn't have the part, but could get it the next day.  The price:  $55.  I placed the order.

I assembled the tools I needed for the job: a 10mm socket wrench, a Phillips screwdriver, a small flat blade screwdriver to remove a screw cover, and a pry bar.  The instructions called for a plastic pry bar to carefully remove the door panel, but I used a small metal pry bar that I already had and wrapped a rag around it to protect the plastic door panel.

As with most projects, the disassembly part was quick and easy.  Installing the new door stop hinge was easy too.  But getting the door panel attached straight and tight when putting everything back together was a little tricky.  Luckily Mrs. Penny Pincher walked by at the right time and helped get the door panel lined up and snapped in nice and tight, just like new!  Tip: line up the door panel at the top, along the window first, and then work down from there.

Here's how much I saved by installing the door check strap myself:

Car shop estimate: $225
Salvaged part cost: $60 (including tax, etc)
Gas to drive to get the salvaged part: $5

Savings: $225 - $60 - $5 = $160

It took about an hour to track down and drive to pick up the salvaged part, and about 30 minutes to install it.  So my hourly rate of pay for doing this project was over $100 per hour!

Even if you don't have any of the tools for this repair and had to buy them, it would still be worth doing this project yourself.  I'm glad I gave this a try considering how much money I saved.


Copyright © 2017 by Dr. Penny Pincher.  All Rights Reserved.  Privacy Policy


Thursday, January 12, 2017

Car Stereo Upgrade FAIL

Sorry for the false alarm, but I decided to return the car stereo I bought to upgrade my older car.  How did such a great plan fail?

Car Stereo Upgrade FAIL!

The plan was that I would drive my wife's newer car (which had a modern stereo with bluetooth, XM, etc.) and she would drive my older car instead of buying a different (and likely newer and more expensive) car to drive.

The only problem was that she was not excited about the old school radio.  She would miss her XM satellite radio and streaming songs from her phone via Bluetooth.

Fortuately, the shortcomings of an older car radio are a pretty easy problem to solve by replacing the old radio with a new one.  For around $120 you can get a fancy new car radio with a USB port that supports Bluetooth streaming.  For about $80 more, you can add an XM satellite radio receiver.  Throw in about $100 more for cables and installation, and you can make an old car seem a lot newer.

So why did I decide to return the car stereo and get my money back?  The first problem was that the buttons on the steering wheel would no longer work.  It would cost over $100 extra to hook them up, so we decided to skip that feature.

The next problem was the total bill for the radio and installation was around $350 with taxes, fees, etc.

From my perspective, the new car radio wasn't really an upgrade since I listen to music on CDs:  the old radio had a 6 disc changer and the new radio only held 1 disc.  Plus, the steering wheel buttons would no longer work.

After further review, we decided to skip upgrading the radio.  My wife will continue to drive the newer car and I will continue to drive my older car.

This reminds me a lot of going with "Option 1" for my computer upgrade.  As you may remember, I decided to do nothing and not upgrade my computer.

Now I have decided to do nothing and not upgrade my car radio.  Do you sense a trend here?


Copyright © 2017 by Dr. Penny Pincher.  All Rights Reserved.  Privacy Policy

Sunday, January 8, 2017

My New Car (Radio)

My 12 year old car has about everything I want- except for one thing.

It has 4 wheel drive, heated leather seats, sun roof, allow rims, rides great, and runs great.  What else is there?  It lacks a modern radio.  It does have a quality sound system with JBL radio which was top of the line in 2005.  But the OEM radio doesn't have a auxillary input, Bluetooth input, or XM radio.

My Old Car Radio Is Getting an Upgrade

Why does this matter?  My wife was looking at new cars that have a modern radio with these features, but has decided to drive my old car instead.  But what about the radio?  She wants to be able to listen to XM satellite radio and stream podcasts and music from her phone.

The good news is that you can buy a new radio with all of these features for under $200.  The new radio also has a USB port for charging and for receiving streaming music from a phone.  Add another $100 or so for installation and cables, and she's all set.

The Replacemet Radio
The Replacemet Radio with Bluetooth, USB, CD player, and Adjustable LED lighting effects


Of course, it would be less expensive to skip getting a new radio.  But spending $300 to fix the one thing wrong with the car seems like a good investment to make the old car more enjoyable reduce the risk of ending up buying a newer car which would cost over 100x more than upgrading the radio.

XM Receiver Module for Radio Upgrade

I haven't looked into this yet, but I might even be able to sell the old JBL radio with 6 disk CD player.  Why would anyone want to buy an old car radio?  Someone who has upgraded the radio in their car (like I am doing) may want to take out the upgraded radio when they sell the car.  I can use any proceeds from selling the old radio to offset the cost of the new radio.

I can't wait to get the new radio installed!  This reminds me of when I was 16 years old and installed a new stereo in my car with a cassette tape player and FM stereo.  This was a big upgrade to the original AM radio that came with the '81 Plymouth Horizon.

If you want to extend the life of your older car, upgrading the radio can be a cheap way to enjoy driving it for years longer and save money over buying a newer car.  The radio is one of the easiest tech items to upgrade.   I have been using my 10 year old Garmin GPS unit that attaches to the windshield with a succion cup, so it has a navigation system too.

Stay tuned for an update on how the car radio upgrade works out.


Copyright © 2017 by Dr. Penny Pincher.  All Rights Reserved.  Privacy Policy

Sunday, January 31, 2016

Oil Change Interval: Miles and Time

How Often Do You Need to Change Your Oil?

How Often Do You Need to Change Your Oil?


Changing the oil regularly is important to keep your car running well.  Clean, fresh oil does a good job of reducing friction in your engine and protecting it from wear and tear.  Over time, your oil gets dirty and it loses its ability to protect your engine.

But how often do you really need to change the oil in your car?  This topic has been in the news a lot over the years.  The old guideline was to change your oil ever 3,000 miles or 3 months- which ever came first.  Some of the windshield reminder stickers given out by service shops still have this outdated information.

Most modern cars call for oil changes every 5,000 to 10,000 miles, depending on driving conditions.  Short trips that don't get the car fully warmed up are harder on oil.

News organizations including The New York Times, Time Magazine, and Scientific American have all weighed in on this question- and all suggest that a 3,000 mile oil change is no longer needed due to advances in engine design and oil chemistry.

I'll share the question from a reader that inspired this article, and then my answer:

"We bought a Toyota RAV4 on October 20.  It was traded in a few days before that and they did some maintenance stuff on it including changing the oil.  

The sticker on the windshield says they changed it on October 15th and that we should change it again on Jan 15th which I haven't done.  We have driven it 911 miles since Oct. 15th. (We don't drive much any more).  The manual for the car says to change the oil every 5k miles. If we did that we wouldn't change the oil for over a year.

Suggestion on when to change?

Also change at the dealer or the Firestone store or Walmart? The dealer is more expensive..."

Thank you for your question!  Although changing the oil in a car is relatively inexpensive- around $30 for a full service oil change- you don't want to waste time and money changing the oil too often.  Plus changing oil more frequently than is needed results in more dirty oil that has to be disposed of somewhere.

Oil Change Interval- Mileage

I pulled up the recommended service interval for a Toyota Rav4 that I found in the Warranty and Maintenance Guide.  The recommended oil change interval is 5,000 miles or 6 months- whichever comes first.

So if the oil was last changed in October, your oil change is good until April if you have driven less than 5,000 miles.  Unless you go on a major spring break trip, you should be well under 5,000 miles on your current oil change by the time the 6 months is up in April.

Oil Change Interval- Time

Since you have only driven 911 miles, you might be able to run longer than 6 months without changing the oil.  Some other websites I checked indicated that oil should be good for up to 12 months.  Over time, oil can become corrosive due to increased acidity and damage engine parts.  Short trips where you engine is not fully warmed up are especially hard on the oil.

I would probably stay with the 5,000 mile/6 month recommendation from the maintenance log for the RAV4.  In general, I would suggest checking and follow the oil change interval recommendations from your vehicle's manufacturer.

Where to Get Your Oil Changed?

Now for the question of where to get your oil changed.  I have found that dealer service departments tend to be more expensive.  Even though the dealer shops usually have free donuts, I take my car to Midas for routine maintenance.  I have received great service there and I use coupons to save at Midas.  Other similar shops include Tuffy, Jiffy Lube, Walmart and Firestone as you mentioned.

Best of luck!


Copyright © 2016 by Dr. Penny Pincher.  All Rights Reserved.  Privacy Policy


Sunday, August 9, 2015

Best Car for a Teen Driver Under $5,000

Choosing a Car for My Teen Driver, Again

A couple years ago, I wrote a post about choosing a car for a teen driver.  I decided to buy a car for my son before he turned 16 so he could practice driving in winter conditions with the same car he would be driving on his own someday.  Here in Iowa, teens can get an Instruction Permit to drive with parents in the car starting at age 14.

It would have been cheaper to have him share my car or my wife's car while he was learning to drive, but that would not have worked out for very long.  We were planning for my son to drive to school on his own and take our youngest son as well.

The car we picked out for my oldest son is working out very well so far and now it is time to do it again.  My youngest son will be turning 16 in about a year.  He has driven some with the cars we have, but I am starting to decide what kind of car to get him.

Of course I could make my oldest son and youngest son share a car to save money, but soon my oldest son will be off to college and I think it would be good to have my son get some experience driving the same car that he will be driving with a parent in the car.

Best Cars For Teens Under $5,000

Our price range is under $5,000 again to avoid making car payments.  We are looking for the usual features: safety, reliability, enough room to haul stuff to college one day.  Even in high school, kids have all kinds of stuff they need to haul around- musical instruments, sporting equipment, science projects, etc.

I would give bonus points for a car with all-wheel drive to get around better on snow and ice.  I am not that worried about fuel economy since my kids will not be driving very many miles, and all of the cars we are considering are small vehicles with small engines.

There are lists around of good cars for teens, but these lists usually have a much higher price range than I could afford and look at much newer models than I can consider.  Finding a good car in the under $5,000 range takes some patience and willingness to go with a good find if it comes along.

I want my son to be excited about his first car, so I am interested in his preferences for color, style, etc.  As long as we get something that is under $5,000 and is safe and reliable I will be pretty happy.  We will be looking at a car about 10 years old, around the 2005 model year to meet our budget.  Based on my preference for something with a lot of cargo room and all-wheel drive, here are some of my favorite models to consider:

Pontiac Vibe / Toyota Matrix


Pontiac Vibe / Toyota Matrix
The Pontiac version is called the Vibe and the Toyota version is called the Matrix, but they are very similar.  The Vibe / Matrix is a 4 door vehicle with a hatchback.  This makes it useful for hauling lots of stuff around.  All-wheel drive is an option, so I might be able to find one that has this.  This model went out of production in 2010, but that doesn't matter much since I am looking for a 2005 or so model year.

Honda Element
Honda Element
Honda Element
My wife and I used to drive a Honda Element years ago.  It has tons of room.  The rear doors are hinged at the back, so you can really open it up to get cargo in and out- plus it has a hatchback.  The Element we had came with all-wheel drive, so I know that is an option.  The main downside of the Element for us was that it only had 4 seats and we wanted to have 5 passenger capability.  The Element went out of production in 2011, but there are still plenty for sale.

Chrysler PT Cruiser
Chrysler PT Cruiser
Chrysler PT Cruiser
The PT Cruiser is a 4 door hatchback with retro styling.  This car has a lot of cargo room.  Some models have a turbo engine, which is recommended since one of the main complaints about the PT Cruiser is that it is under-powered.  PT Cruiser does not have an all-wheel drive option.  The PT Cruiser went out of production in 2010.  Some people like the styling of PT Cruiser and some do not- I think they are cool-looking and much more practical to own than a classic car.

Volvo V70 Station Wagon
Volvo V70 Wagon
Volvo V70 Wagon

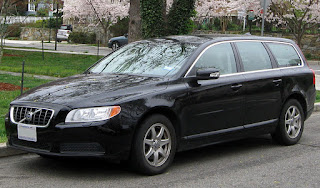
The Volvo V70 has 4 doors and a hatchback.  Volvo has a good reputation for safety, and the V70 has an all-wheel drive option.  I am not sure how this will rate with my son for style, but I think this would be a good reliable car with lots of cargo capability.

Subaru Outback
Subaru Outback
Subaru Outback

All Subarus are all-wheel drive, so this is covered.  The Subaru Outback is a station wagon form of either a Subaru Legend or Subaru Impreza.  With 4 doors and a hatchback, an Outback would be good at handling some cargo.

Which Car Will We Choose For Our Teen Driver?

I think any of these would be good choices, and I am sure there are other good options as well.  I will work with my son to find out what he prefers and then zero in on a particular model to find one in great condition, with the options we want, and within our budget of $5,000.  And hopefully the right color, too...


Copyright © 2015 by Dr. Penny Pincher.  All Rights Reserved.  Privacy Policy

Sunday, April 12, 2015

Rust Converter- Turn Rusty Metal into Primer

Rust Converter- Restore Rusty Items

I have always been interested in rust converter.  You can put rust converter on a rusty metal surface and it forms a black protective coat, ready for painting.  Rust converter works using a chemical reaction with tannic acid which converts iron oxide into black colored ferric tannate, which is much more stable than rust.  I like that rust converter chemically reacts with the rust to convert it to something else.  I like the idea of changing the rust into something else instead of just painting over it and watching it rust through again later.

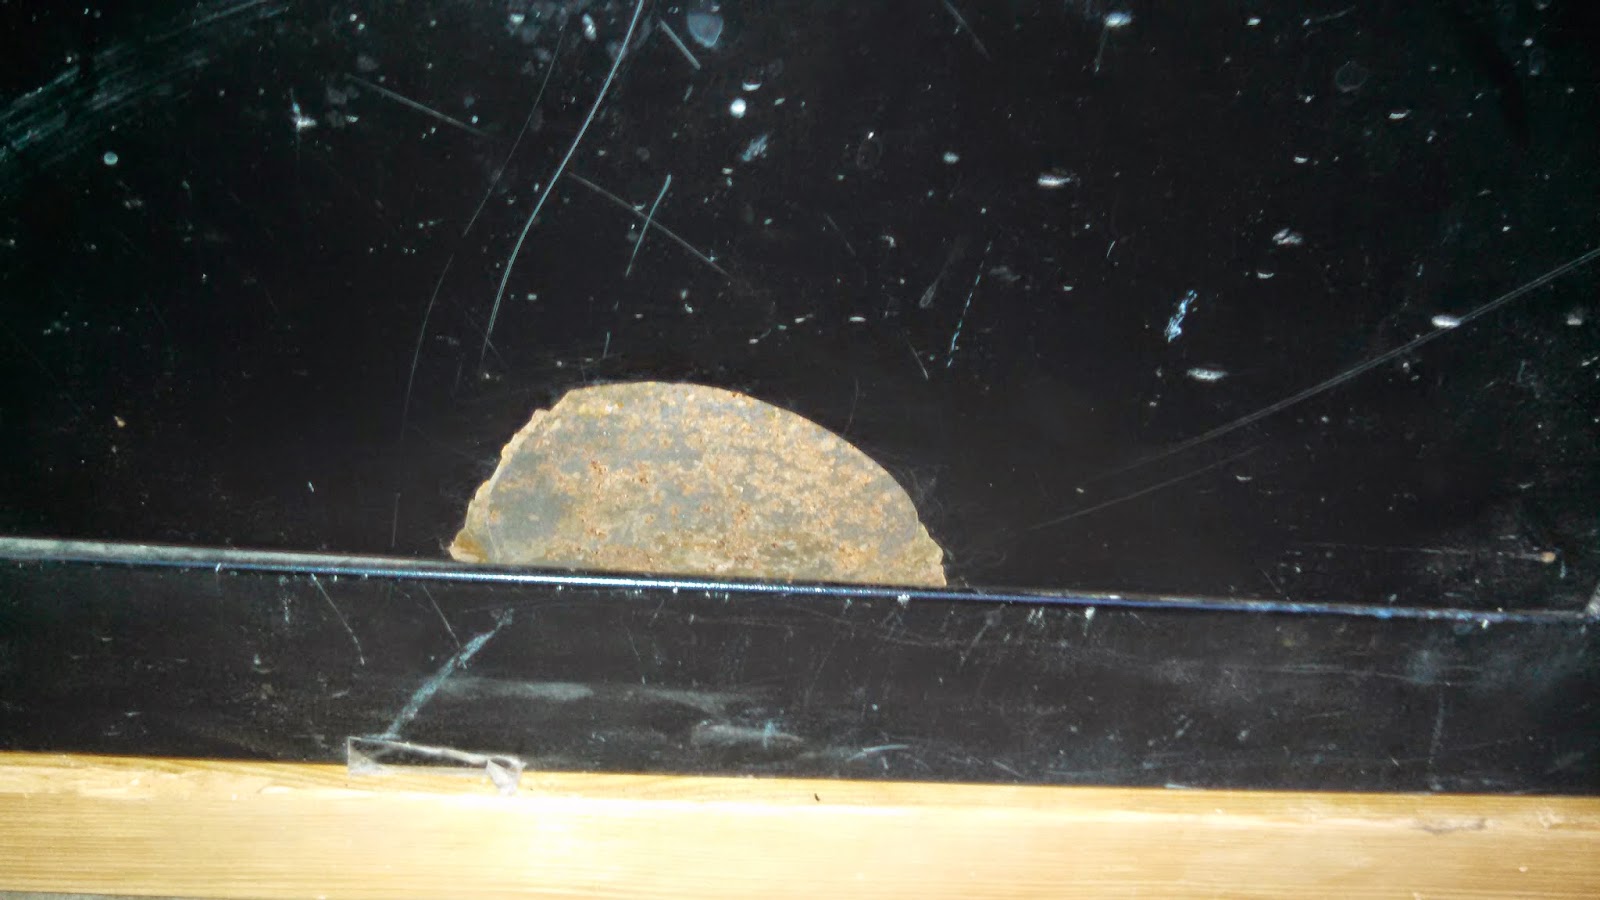
My son's car has some rust coming through at the bottom.  Conveniently, his car is black, so the black ferric tannate will almost match his car's color.  I also have a black metal cabinet in my shop that has a rusty spot about 1 inch tall by 2 inches wide where the paint chipped off.  I'll try the rust converter on the metal cabinet first before we try it on my son's car.

Before Rust Converter


Rusty Metal Surface- Before Rust Converter
Image Source: Dr. Penny Pincher

As you can see, there is a rusty spot on my metal cabinet.  This is a great place to try out the rust converter.

Permatex Rust Converter
Image Source: Dr. Penny Pincher

I went with Permatex Rust Treatment, which is a rust converter.  An 8 oz bottle which can convert 20 square feet sells for about $6.50.  A 16 oz bottle sells for around $10.  You can buy this at a car parts store or on amazon:
Permatex 81773 Rust Treatment , 16 oz.

Applying Rust Converter with Small Paintbrush
Image Source: Dr. Penny Pincher

When applying rust converter, it is important to pour a small amount into a different container.  If you dip your brush into the bottle, the chemical can activate from rust on your brush, ruining the whole bottle of rust converter.  I found a cup in my recycling bin and wiped it out.  I poured a very small amount into the cup since my rusty surface was pretty small.  I used a small paintbrush to apply the rust converter to the rusty surface.

Rust Converter- First Coat, Wet
Image Source: Dr. Penny Pincher

The photo above shows the first coat of rust converter while it is still wet.  It didn't take much at all to cover this small rusty patch.  After 15 minutes, I put on a second coat.  The photo below shows the rusty area with a second coat of rust converter while still wet.


Rust Converter, Second Coat, Wet
Image Source: Dr. Penny Pincher

At this point, I was a bit worried.  I was putting the rust converter on to make the rusty spot less noticeable, but now it was very noticeable since it was white.  I went let the rust converter dry overnight and came back to check out the results the next morning.

After Rust Converter

I was happy to see that the rust converter did turn black as promised.  The rust converter is suitable as a primer.  I think the black color is close enough, and the metal cabinet is in a protected area in my shop, so I don't think I will paint it.  I will just leave the rust converter as the top coat.


After Rust Converter- The Rust is Completely Converted to Black Primer
Image Source: Dr. Penny Pincher


Close-up of Rusty Surface After Rust Converter.  The Rust Has Transformed into a Black Surface.
Close-up of Rusty Surface After Rust Converter.  The Rust Has Transformed into a Black Surface.
Image Source: Dr. Penny Pincher

I will definitely go ahead and use rust converter on my son's car.  I will plan to put paint on over the rust converter since the car will be exposed to water and salt in the winter.

Rust converter is a great way to take care of rusty surfaces, stopping the rust and providing a good primer coat that can be painted.

Permatex 81773 Rust Treatment , 16 oz.

Copyright © 2015 Dr. Penny Pincher.  All Rights Reserved.  Privacy Policy


Sunday, April 20, 2014

New Car Smell- Use an Air Purifier in Your Car

Use an Air Purifier in Your Car- Get That New Car Smell

Today I used my Shop Vac to vacuum out the grime that had accumulated in my car over the winter.  I also used some Lemon Pledge furniture cleaner to clean the dashboard and plastic trim.  I was out of Armor All, and the Lemon Pledge worked great.

When I was done, my car was pretty clean inside, but it didn't smell clean.  My dogs enjoy going for rides, and my car smelled sort of doggy and stale, and a bit lemony from the Lemon Pledge spray.

I decided to bring out the big gun.  I just got a New Comfort 6 stage air purifier for my house.  It has 6 stages of filtration and can handle a 3,000 square foot area.  I decided to use this in my car.  I cracked the window just enough to get an extension cord in.


How to Use an Air Purifier in Your Car
How to Use an Air Purifier in Your Car- Run an Extension Cord Through the Window
Image Source: Dr. Penny Pincher

Next, I folded down the back seat so the air from the trunk could circulate as well and turned it on high.

Home Air Purifier Running in the Back Seat of My Car
Image Source: Dr. Penny Pincher

Get the New Car Smell Using an Air Purifier

The best way to address odors is to eliminate the source of the odor.  I vacuumed all of the fur and dust that I could, and got rid of some winter mittens and other gear that can hold odor.  Running the air purifier will remove odors from the air using its charcoal filter and some of the other filters as well.  As odor is released, the air purifier absorbs it and over time the source of the odor is exhausted.

Of course, you can buy an air freshener for your car for a couple bucks, but the chemical smell gives me headaches.  I wanted my air to actually be clean, so I cleaned it using my house air purifier.

Use an Air Purifier to Get that New Car Smell
Image Source: Dr. Penny Pincher

If your car has cigarette odor, you can use the ozone setting on an air purifier.  I did not use the ozone production on mine- ozone is hazardous and can damage plastic parts.

You can learn more about the New Comfort air purifier here.  This air purifier moves a lot of air and has filter stages that remove pollen, dust, germs and odors from your air.  This air purifier even has a UV light that kills viruses and bacteria.


Air Purifier for Cars

If you want to purify the air in your car all the time when you are driving, you can get air purifiers for cars that run on 12V power.  Some of these filters have features similar to home air filters, but are smaller and have less air circulation capacity.


What is the New Car Smell?  Is it Toxic?

The "new car smell" in a new car is actually the smell of formaldehyde and volatile organic compounds off gassing from the upholstery, glues, and plastic materials in the new car.  People think of the new car smell as a good thing since it is associated with new cars, but it is not very healthy to breathe.  If you have a new car- or a new house-you might want to use an air purifier to absorb the harmful chemicals or leave your windows down to let that new car smell air out.

Recommended Reading:
The Sales Pitch: How to Sell Anything is an article about how a great sales pitch can get people to buy things they don't need and can't afford.  How do great salesmen get you to buy things?


Copyright © 2014 by Dr. Penny Pincher.  All Rights Reserved.  Privacy Policy

Saturday, March 8, 2014

Midas Coupons and Discounts- I Saved $40 Today!

Midas Coupons- Save Money on Vehicle Maintenance

I took my good old Civic into Midas today to replace the alternator serpentine belts and get an oil change and tire rotation.  I had been warned a few months ago at my last oil change about the condition of the serpentine belts, and decided to get this taken care of today since I had some Midas coupons.

Use Midas Coupons to Save Money on Car Repairs
Image Source: Dr. Penny Pincher

I had a $5 coupon on an oil change and a $10 coupon for service over $50.  Midas happened to be running a special on oil changes, so I got an additional $4.07 off the bill for the oil change.  Plus they have a special on tire rotation, so I got a $20 tire rotation for free.  This brought my total savings off of my bill to just under $40.

Midas Coupons are Worth Finding
Image Source: Dr. Penny Pincher


Where to Get Midas Coupons

I got my coupons in the mail since I am on the Midas mailing list.  You can also get Midas coupons for free from the Midas website (http://www.midas.com/coupons.aspx).  I have found the managers at the Midas shops I visit to be helpful at helping find discounts and coupons and also to sort out which repairs are more urgent and which can wait.


It's Great to Save at Midas with Coupons!
Image Source: Dr. Penny Pincher

All vehicles need maintenance sometimes.  You might as well round up your best coupons and save money on your vehicle service bill.  My bill today was $40 less than it would have been without Midas coupons and discounts.

Recommended Reading:
Best Value Car Maintenance and Auto Repair Tips
Synthetic Oil vs Regular Oil


Copyright © 2014 by Dr. Penny Pincher.  All Rights Reserved.  Privacy Policy

Sunday, December 1, 2013

How Can a Bad Gas Cap Cause a Check Engine Light?

Why Is It Important to Tighten Your Gas Cap?

When you replace your gas cap after filling up at the gas station, you have probably noticed that the gas cap clicks as you tighten it.  There is usually a sticker or a note on the gas cap that indicates to tighten it at least 3 clicks.  Some vehicles have a note that says the check engine light may come on if you do not tighten the gas cap at least 3 clicks.  Why is the engine so sensitive to the gas cap?

A Bad Gas Cap Can Cause the Check Engine Light to Turn On
Image Source: Dr. Penny Pincher

The Gas Cap Helps Capture Fuel Vapors

The gas cap is part of the evaporative emission control system on a vehicle.  In the old days, gas caps simply had a small hole to allow fuel vapor to vent.  Modern vehicles have a system in place to capture these fuel vapors and prevent uncombusted hydrocarbons from escaping into the atmosphere.  Fuel vapors from the gas tank are routed through vacuum lines and the fuel vapor is condensed and fed into the engine, allowing the fuel to be burned in the vehicle's engine.

Why Does a Bad Gas Cap Cause the Check Engine Light to Turn On?

The evaporative emission control system has sensors to monitor for leaks to detect if fuel vapor is escaping.  If pressure is not maintained in the system, the check engine light comes on to indicate that fuel vapor is leaking.  One source of a leak can be a bad gas cap, a missing gas cap, or a gas cap that is not tightened fully.

Check Engine Light from Evaporative Emision Control System Fault- Bad Gas Cap
Image Source: Dr. Penny Pincher


Can Replacing the Gas Cap Turn Off the Check Engine Light?

Since tightening or even replacing a gas cap is easy and inexpensive, it is often the first thing to try to resolve a check engine light related to the evaporative emission control system.  You can use a OBD II code reader or scan tool to find information about the cause of the check engine light fault in your vehicle.  There are several codes related to the evaporative emission control system that could be caused by a bad gas cap:
  • P0440
  • P0455
  • P0442
A Bad Gas Cap can Cause the Check Engine Light to Stay On
Image Source: Dr. Penny Pincher


Diagnostic Scan Tool from Amazon- read your own engine fault codes on any car 1996 or newer...


If you have one of these faults, make sure you have tightened your gas cap at least 3 clicks.  If your cap is tight and you still have the check engine light on, consider replacing the gas cap.  The cost of a replacement gas cap is about $15.  There are many possible causes for evaporative emission faults, but you can easily replace the gas cap yourself for a few dollars.  If you are lucky, this will resolve your check engine light.

The on-board computer may require a number of starts without detecting a fault to clear the check engine light, so it may take a few weeks to see if a new gas cap cleared the fault.  You can use a OBD II diagnostic scan tool tool to clear the fault.  This will turn off your check engine light so you can easily see if it returns or not with a new gas cap.


If tightening your gas cap or replacing your gas cap with a new one does not clear your check engine light, you may need to take your vehicle to a mechanic to diagnose the problem.

How I Made My Check Engine Light Turn Off By Replacing the Gas Cap

The check engine light on my car came on.  I used a code scanner to check the fault code and found the following fault codes:

  • P0440 Evaporative Emission
  • P0441 Canister Purge Valve

These fault codes can be caused by a number of issues with the evaporative emission control system, including the pressure pump, vacuum line leaks or a bad solenoid.  A faulty gas cap can also cause these faults.  I noticed that the gas cap was not clicking very firmly when I tightened it.  I decided to try replacing the gas cap since it was easy to do and does not cost very much.

I spent a few dollars extra to get an OEM gas cap from a dealer parts counter.  The advantage was that this gas cap included the plastic line that hooks onto the inside of the fuel door so you can allow the gas cap to hang while you are filling up.  The disadvantage of buying an OEM fuel cap was that it cost $22.  A generic gas cap costs about $5.

The result:  My check engine light turned off within a few days after replacing the gas cap.


Copyright © 2013 Dr. Penny Pincher.  All Rights Reserved.  Privacy Policy

Saturday, November 16, 2013

Windshield Water Repellent: Rain X vs Car Wax

Windshield Water Repellent

Windshield water repellent makes water bead up on your windshield, increasing visibility when driving in rain or snow.  This is similar to the effect that you see with freshly waxed metal surfaces on your car.  Visibility problems occur when water spreads out over the surface of your windshield.  Water repellent makes water try to minimize its contact with your windshield.  The result: water pulls into tight droplets that don't interfere as much with your visibility.  Another benefit: water will blow off of your windshield without even using your windshield wipers.  Water repellent also makes it easier for your windshield wipers to push water off of the windshield.

There are two ways to get the benefit of water repellent for your windshield: Rain X or car wax.

Windshield Water Repellent with Rain X or Car Wax
Image Source: Dr. Penny Pincher

Rain X Windshield Water Repellent

Rain X Windshield Treatment

There are a couple of Rain X products that you can put on your windshield to repel water to improve visibility in rain or snow.  After application of Rain X, water beads up on the windshield instead of spreading across the windshield.  I found that I don't need to use my windshield wipers unless it is raining fairly hard.  Water stays beaded up and even blows off of the windshield while driving.

Rain X Windshield Treatment provides the water repellent treatment for your windshield.  This liquid compound is applied to the windshield like car wax.  After it hazes over, it wipes off and leaves your windshield water repellent for a few months.


Rain X 2 in 1

Rain X 2 in 1 Glass Cleaner and Rain Repellent sprays on and wipes off just like glass cleaner such as Windex.  Like the original Rain X formula, Rain X 2 in 1 also leaves your windshield water repellent for better visibility in wet weather.


Use Car Wax as Windshield Water Repellent

When I used the original Rain X formula, it reminded me a lot of car wax.  In fact, the effect of Rain X on a windshield is very similar to the effect of car wax on metal.  I decided to try applying car wax to my windshield to see if it would provide the same water repellent effect as Rain X.  My bottle of Rain X was long empty, and my windshield was making it very hard to see if there was any rain at all.


Use Synthetic Car Wax as Windshield Rain Repellent
Image Source: Dr. Penny Pincher

I was a little nervous about trying car wax on my windshield.  My fear was that the wax would get hazy and then be very hard to remove from the windshield.  This turned out not to be the case- the wax went on easily and came off easily.  I used Meguiars Tech Wax 2.0, which is a full synthetic wax.


I pulled my car in the garage with the windshield damp from driving in a light rain.  I placed a small amount of synthetic car wax on a clean cloth and applied it to one half of the windshield in the same manner as waxing a car.  I added a bit more wax to my rag and waxed the other half of the windshield.  I had a light coat of wax evenly over the entire windshield.  I allowed the wax to try and haze over for about 10 minutes.  The wax came off of the glass windshield even easier than it comes off of the metal of the car body.  It was very easy to remove the wax and it left the windshield looking very clean.  The windshield felt very slippery to the touch.

How to use car wax as windshield water repellent:
Step 1. Clean your windshield and moisten it with a little water
Step 2. Apply a light coat of car wax to your windshield
Step 3. Let the wax haze over for about 10 minutes
Step 4. Remove the car wax with a clean cloth by hand- use a circular buffing pattern

Of course, I had to take the car for a drive in the rain to see how well car wax works as windshield water repellent.

Windshield with Water Repellent from Car Wax
Image Source: Dr. Penny Pincher

The car wax worked great as water repellent.  The water beaded up and blew off of the windshield without even turning on the windshield wipers.  What an improvement!  The result is very similar to using Rain X.

If you are using car wax on your windshield, avoid using any wax that has abrasives to avoid making tiny scratches in your windshield.  Also, I would recommend buffing lightly by hand rather than using a power orbital buffer.  Again, this is to avoid scratching your windshield.  A final note, if you have small rock chips or scratches in your windshield, the wax can fill these in and turn white, making these imperfections more noticeable.

My windshield is in good condition, with only one very minor windshield rock chip.  Overall, I think the results of using car wax as windshield water repellent worked very well.


Copyright © 2013 Dr. Penny Pincher.  All Rights Reserved.  Privacy Policy


Wednesday, November 13, 2013

Synthetic Oil vs Regular Oil

What Is Synthetic Motor Oil?


Synthetic Motor Oil- Mobil 1
Image Source: Dr. Penny Pincher
Conventional motor oil (also called regular motor oil) is refined from crude oil pumped out of the ground.  Crude oil contains hydrocarbon chains ranging from very short (thin liquid) to very long (thick liquid or gel).  During the refining process, the crude oil is separated into different thicknesses to create products for specific purposes.  Even though the refining process creates petroleum products of similar consistency, there is still a lot of variability in the hydrocarbon chains that are contained in regular motor oil.


Synthetic motor oil is made in an industrial process.  The specific length of the carbon chains can be controlled by the manufacturing process to create a more consistent motor oil.  The result is that synthetic motor oil can withstand higher temperatures and is more slippery than regular motor oil.  It takes a lot of energy and processing to make synthetic motor oil in a factory- this is why it costs more than conventional motor oil.

Advantages of Synthetic Motor Oil over Regular Oil


Regular Motor Oil / Conventional Motor Oil- Pennzoil
Image Source: Dr. Penny Pincher

Synthetic motor oil is carefully formulated to function well for lubrication and heat transfer in the harsh environment on an automobile engine.  Regular motor oil breaks down more quickly under the high temperature in an engine.  Synthetic motor oil lasts longer- it continues to deliver effective lubrication and heat transfer to an engine longer than conventional oil.


The longer life of synthetic oil means that you could go longer between oil changes, potentially making up for the higher cost of the oil.  This also has the advantage of contributing less waste to landfills and recycling centers.  If you can go twice as long on an oil change, you are throwing away half as much used motor oil and half as many used oil filters.

Another advantage of synthetic motor oil is improved gas mileage.  Synthetic oil is really slippery stuff and retains excellent lubrication properties for a long time compared with regular oil.  Better lubrication means that you waste less energy on friction and get more efficiency from your engine using synthetic oil.

Disadvantage of Synthetic Oil

Sometimes Conventional Oil is Better...

In the early days, synthetic oil caused problems in many engines.  The additives that condition seals inside the engine were not the same as in regular oil.  Seals dried out when running on synthetic oil, and even newer engines would start leaking oil.  This problem has been overcome by advancement in the formulation of additives to synthetic oil.

However, oil leakage is still a problem with older engines.  Synthetic oil is so slippery that it leaks more easily in older engines than regular oil.  My Honda Civic with about 170,000 miles had been running great on full synthetic oil- then it started leaking oil.  After some research, I decided to switch from full synthetic to regular oil.  The oil leaking completely stopped after changing from synthetic oil to regular oil.

Cost of Synthetic Oil vs Regular Oil

Synthetic oil costs about $8 per quart for name brands like Mobile 1.  Regular motor oil costs about $5 per quart for name brands such as Pennzoil, Valvoline, and Quaker State.  So, a rough estimate is that full synthetic oil is about twice as expensive as conventional oil.

What about Cheaper Synthetic Blend Oil?


Synthetic Blend Motor Oil- Motorcraft
Image Source: Dr. Penny Pincher

Synthetic Blend is a mixture of synthetic oil and regular oil.  The main advantage of synthetic blend is that it costs less than full synthetic oil.  The cost of synthetic blend is about $6 per quart.  The performance of synthetic blend oil is intermediate between full synthetic oil and conventional oil.  You get some of the benefit of synthetic oil and pay some of the extra cost.

Is It Worth Spending More on Synthetic Motor Oil?

Synthetic Oil Recommended For Newer Cars and Highway Driving

My opinion is that if you drive a newer vehicle and drive mostly highway miles, using full synthetic oil is a good value.  You get better protection for your engine, you get slightly better gas mileage, and you can go a bit longer between oil changes.  All of these benefits are possible because of the increased performance of synthetic oil relative to regular oil.

The extra cost of synthetic oil can be largely offset by going slightly longer between oil changes than you would if you were running with conventional oil.  For example, the oil change interval for my Honda Civic is 10,000 miles.  If I am running conventional oil, I might go in for an oil change every 5,000 to 7,500 miles.  With full synthetic, I would be comfortable going the full recommended oil change interval between oil changes, reducing the number of oil changes I would need.

Synthetic Oil Not Recommended For Older Cars or Severe Driving Conditions

If you do stop-and-go city driving, or short trips that do not fully warm up your engine, you might want to consider more frequent oil changes.  Your oil will need frequent changes due to increased contaminants from your engine accumulating in your oil and  from faster break-down of your oil under severe driving conditions.  The need for frequent oil changes makes synthetic oil less attractive.  Conventional oil might be a better option if you are doing frequent oil changes anyway.

The life of the oil filter is another important factor.  Oil filters consist of paper filters and have a pretty limited life.  Even if your oil can go a long time, your filter is a limiting factor on how long you should go between oil changes.  Severe driving conditions can shorten the life of your oil filter as well as your oil.

If you have an older engine, synthetic oil may tend to leak more.  If your car is leaking oil you may want to avoid synthetic oil.

Can You Save Money Using Conventional Motor Oil?

Conventional oil is less expensive than synthetic oil.  If you change your oil frequently, you can save money by simply using conventional oil since it is less expensive.  You can save $20 to $30 per oil change using conventional oil rather than synthetic oil.  The value of synthetic oil is that it can last longer and offer better protection for your engine.  Conventional oil is adequate for normal driving conditions if you change the oil frequently enough.  Using a synthetic blend is an option to get some of the benefits of increased protection and oil life without paying the cost for full synthetic oil.


Copyright © 2013 Dr. Penny Pincher.  All Rights Reserved.  Privacy Policy

Recent Penny Pincher Posts