Upgrade Your Ceiling Fan- Get Uplight and Remote Control
 |
| Ceiling Fan Upgrade Options: Uplight, Downlight, and Remote Control Image Source: Dr. Penny Pincher |
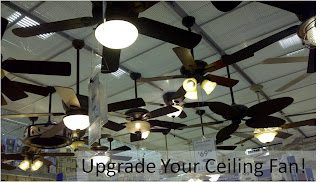
My wife tried to convince me to buy a discount ceiling fan at Lowes and install it at home. There were several display ceiling fans that had been taken down and were lined up resting in shopping carts. The one my wife was interested in was Harbor Breeze Wakefield 52 inch ceiling fan with up lights, down lights, and a variable speed ceiling fan with remote control. Our old ceiling fan was a simple ceiling fan with no lights or remote control. I had several reasonable and rational objections to this plan:
- We already had a working ceiling fan, why replace it? OK, the fan we already have doesn’t have lights, but we have lamps in the living room that we can use.
- The close-out bargain ceiling fan cost $80, which is a lot more than nothing which is how much not replacing it would cost.
- I didn’t want to mess with wiring and installing a new ceiling fan myself.
- The bargain ceiling fan was a demo model and not even in its original box- what if parts were missing?
These objections were noted and overruled. The new ceiling fan was purchased and brought home and awaiting installation. On the bright side, we got a fan that originally sold for over $200 for only $80- and it came with a full set of compact fluorescent lights installed. And it had a remote control. I didn’t really even notice the remote control until after we bought it.
 |
| Harbor Breeze Wakefield Ceiling Fan With Uplight and Remote Control Image Source: Dr. Penny Pincher |
Ceiling Fan Installation Steps
The installation process started with about an hour of complaining. I then got out to work following these steps to remove the old ceiling fan and install the new one:
- Read ceiling fan installation instructions
- Check to see that all parts needed are present
- Switch off power to the ceiling fan at circuit breaker. Check to make sure the power to the old ceiling fan is off after switching off the circuit breaker. If the ceiling fan still turns, try a different breaker…
- Get a step ladder, set it up under the old ceiling fan
- Remove the old ceiling fan. There is usually a mounting screw that must be removed. Sometimes it is hidden under trim that snaps in place. Newer ceiling fans can hang in place while you work on the wiring. Let the fan hang and disconnect the wiring. Since I’m paranoid, I took a picture of the connections of the wiring to the old fan before disconnecting anything- just in case. Take the old fan down and set aside.
- Install the new ceiling fan. Hang it in place and connect the wiring with wire nuts. Make sure the wire nuts are nice and tight and that the correct wires are connected together. It’s usually pretty obvious like white wire connected to white wire, black wire connected to black wire, etc. Now raise the new ceiling into position and install the mounting screw and trim.
- Now the moment of truth- switch the breaker on and try out your new ceiling fan.
 |
| Ceiling Fan remote control for fan speed, uplight, and downlight Image Source: Dr. Penny Pincher |
Easy Project: Upgrading a Ceiling Fan
Upgrading a ceiling fan is an easy project- this took me about 45 minutes to remove the old ceiling fan and install the new ceiling fan. If you have a properly installed existing ceiling fan, it is really easy to install a replacement ceiling fan.
If you want to install a ceiling fan in a place that does not have an existing ceiling fan, you may need to tear into the ceiling to install a junction box that can carry the weight of a ceiling fan- a much bigger project and you may want to consider hiring a professional contractor.
 |
| A ceiling fan uplight provides perfect lighting for watching TV Image Source: Dr. Penny Pincher |
Ceiling Fan Upgrade- Good Value!
If you don’t have a remote control ceiling fan with up-lights, you don’t know what you’re missing!
The up-light is perfect for watching TV. The light reflects off of the ceiling and provides a nice low level illumination. The fan also has a regular light on the bottom, a down-light I guess, which provides more light if you want that. The ceiling fan also works well, and all of the functions are controlled by a remote control. I use this all the time to control the lights and ceiling fan speed without getting up.
One of the first things to do when installing a new ceiling fan is to make sure it rotates in the correct direction. Most fans are reversible and have clockwise and counterclockwise rotation directions for summer and winter. You want your ceiling fan to make you feel cooler in summer and warmer in winter by moving air in the proper direction. The Harbor Breeze has no obvious way to reverse the ceiling fan direction. It took a bit of research to discover the proper ceiling fan rotation direction for summer and winter and how to change the ceiling fan rotation direction on a ceiling fan without a switch.
I use the features of the new fan every day, and a fancy fan like this probably increases the resale value of my house. We use the uplight every evening, occasionally use the downlight, and use the fan most days. It is really handy to be able to control the lights and fan speed without getting up. I'm glad we upgraded our ceiling fan, this was a project well worth doing.
Recommended Reading:
Which direction should your ceiling fan rotate in summer and winter to save you money?
Best Products to Buy to Save Money
Copyright © 2013 by Dr. Penny Pincher. All Rights Reserved. Privacy Policy


