Friday, May 24, 2013

How to Change the Oil in your Lawn Mower

Lawn Mower Oil Changes

Changing the oil frequently in your lawn mower engine is your best chance to extend the life of your lawn mower, saving you money.  Small engines such as those on push lawn mowers need effective motor oil to provide lubrication and distribute heat to protect the engine from damage.  Old motor oil breaks down over time and will no longer protect the engine properly.  Motor oil also gets dirty with wear particles from the engine and from dust and contaminants that are introduced into the motor with air intake during use, causing increased wear on the engine when running with dirty oil.


How often do you need to change the motor oil in your lawn mower?

The manual for your walk behind lawn mower will provide recommended oil change intervals.  The minimum oil change interval for a lawn mower should be at least one oil change per year.  Oil changes more than once a year may be needed depending  on amount of use.


How much does it cost to change the oil in a lawn mower?

The cost for a lawn mower oil change at a service shop ranges from about $15 to $30.  The cost of a lawn mower oil change will depend on if the shop transports your mower, or if you bring it to the shop yourself.  They may also recommend replacing the spark plug and sharpening or replacing the mower blade when you get the oil changed.

You can change your own lawn mower motor oil for a few dollars.  A quart of oil costs about $3- and you can get up to 4 lawn mower oil changes from one quart.  If you need to buy a siphon pump, this will cost about $25, but the pump should last for many oil changes.  A pan to collect used motor oil is free if you can find recycled materials around your house or garage, otherwise you can buy a small plastic bin for about $3. You can transfer used oil from your pan to other containers, such as empty oil bottles, allowing you to re-use the pan.


How do you get the old oil out of the lawn mower to change lawn mower oil?

Remove oil through the oil drain plug
If you’re lucky, your push mower will have an oil drain plug.  This makes oil changes really easy.  The picture below shows the location of the oil drain plug on a lawn mower.  You may need to clean grass and debris away from the base of your lawn mower engine to see the drain plug.  A small socket wrench is the tool you'll need to remove the oil drain plug from your lawn mower.


The oil drain is located at the bottom of the engine
Lawn Mower Oil Drain Plug, Dipstick Tube, and Oil Sticker Locations
Image Source: Dr. Penny Pincher


Remove oil through the dipstick tube
Some small engines do not have an oil drain plug.  If your engine doesn’t have an oil drain plug, you will either need to tip the lawn mower on its side to drain oil out of the dipstick tube or use a siphon pump.  The dipstick cover can be unscrewed and removed to drain oil.

Remove oil with a siphon pump
You can use a suction pump or siphon pump to draw the old oil out of the engine.  This allows oil to be removed from the lawn mower engine without tipping the mower on its side.  Siphon pumps can be purchased at auto parts stores or on the internet for under $25.  Siphon pumps can be used to transfer oil, gas, and other fluids as well as air inflation.  The dipstick cover can be unscrewed and removed to allow the siphon pump tube to be put in place to remove oil.


What are the steps to change lawn mower oil?

Step 1.  Make sure you have new oil available before you drain the old oil.  Most lawn mowers take SAE 30 or 10W30.  You mower may have a sticker that indicates the type of oil.  If not, check the manual for the correct type of motor oil.  Most lawn mowers require about 8 oz of motor oil.  If your lawn mower has an oil filter, obtain a replacement oil filter.  You may need to order one from a parts dealer.

Step 2. Run the lawn mower for about 5 minutes to get the oil warm.  This will make it much easier to remove more of the old oil.

Step 3. Drain the old oil from your mower.  You’ll need a pan to catch the used motor oil.  
If your lawn mower has a drain plug, position a plastic cup under the drain plug and use a wrench to remove the plug.  A small socket wrench is the best tool to use to remove the oil drain plug.  Also remove the dipstick to allow the oil to drain quickly.

If your lawn mower does not have a oil drain plug, place a pan on the same side of the lawn mower as your dipstick tube, remove the dipstick cover (unscrew), and tip the mower on its side to drain the old oil into the pan.  You’ll need to tip the mower more than 90 degrees to get the oil out.  This will work best if you have a low profile pan so you have enough room to tip your mower.

If you are using a suction pump, insert one end of the tube into oil dipstick tube and place the other end in the pan you are using to collect the used motor oil.  Squeeze the pump bulb, or operate the piston, to pump the old oil out of your lawn mower.

Step 4. If your lawn mower has an oil filter, replace the old oil filter with a new one.  Unscrew and remove the old oil filter and discard.  Apply some oil to coat the seal around the new oil filter to prevent oil leakage.  Then tighten the new oil filter in place.

Step 5. Fill your lawn mower with new oil.  Replace your drain plug (if you have one) and tighten using a wrench or socket driver.  Tighten firmly, but not too tight or it will be hard to remove next time.  Place your lawn mower on a level surface and use your dipstick to check the level as you fill the oil reservoir through the dipstick tube.  You may need a funnel if your dipstick tube has a small opening.  Over filling or under filling your engine with oil can cause damage to your engine, so use the correct fill level.


Lawn mower oil dipstick
Check your lawn mower oil level with a dipstick
Image Source: Dr. Penny Pincher


Step 6. Dispose of your used motor oil properly.  In some areas you will need to place the used motor oil in a container with a lid and take it to a recycling center for disposal.  Auto supply shops may also accept used motor oil for recycling.


Safety when changing oil in a lawn mower

  • Use caution to avoid starting a grass fire.  Hot parts of your engine can cause grass to ignite when tipping your mower to drain oil.  You want the engine warm to help oil drain, but not too hot.
  • Use caution with fuel.  You can drain the fuel from your tank, or wait until your fuel tank is empty to avoid spilling any gas if you need to tip your mower to drain the oil.  Gas can leak out the fuel cap when you tip your mower.
  • You can disconnect the spark plug cap to avoid the mower accidently starting while you are working on it.

If you never want to change oil in your lawn mower again, check out electric lawn mowers!


Recommended reading:


Penny Pincher Journal
Copyright © 2013 Dr. Penny Pincher.  All Rights Reserved.  Privacy Policy

Wednesday, May 22, 2013

How to Sell your Old Cell Phone and Get Cash


How to Get Cash for your Used Cell Phone

If you have an old cell phone that you are not using, you can quickly and easily get cash for it.  It is easier than ever to sell a used cell phone, with more businesses buying used cell phones to sell in secondary markets.  Prices offered by phone buyback companies are competitive since they want to buy your cell phone and resell it for a profit.

There are four ways to get cash for your old cell phone.  The best method for selling your cell phone will depend on how quickly you want to get your cash .  Also, the condition of your phone and the local demand for your phone are factors to consider.  If your phone is in excellent condition, you may get more selling it yourself to an individual buyer through craigslist or eBay.  If your cell phone is in average or worse condition, you may be better off selling it to a buying company rather than an individual.  If your phone is a few years old, you may have trouble finding a local buyer unless it is a very popular model such as an iPhone.


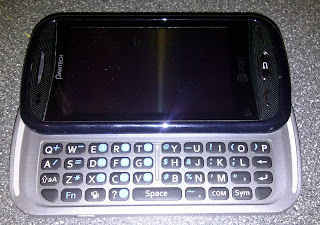
Pantech cell phone
Sell your used cell phone and get cash!
Image Source: Dr. Penny Piincher

How to Sell A Cell Phone

Get Money for your Cell Phone from ecoATM

This is an interesting way to get money for your cell phone.  ecoATM machines are artificial intelligence kiosks that use automatic image analysis to examine the condition of your cell phone.  ecoATM uses electrical diagnostics to make determine whether it is in good working order- you are offered a connector so you can plug your phone into the ecoATM for evaluation.  ecoATM will offer you a price for your phone and you can decide whether or not to sell it.  As you might expect from the ATM part of the name, you can get instant cash for your cell phone.

ecoATM does use a remote human operator to compare the photo on your ID with the video feed from the ecoATM.  The identity of sellers is tracked carefully to allow investigation if stolen cell phones are cashed in at ecoATM.
  

a machine that evaluates your cell phone and dispenses cash
ecoATM: an intelligent kiosk that buys cell phones
Image Source: Dr. Penny Pincher

Sell your Phone at an Electronics Store

Electronics stores such as Best Buy and GameStop will buy your used cell phone at the store.  Best Buy calls their program a trade in, but you don’t need to buy a new phone in order to sell your old phone.  At the service counter, they will look up your phone in a database by make, model, and condition and offer you a price.  They will also power up your phone and check that it is good working order.  You can get instant cash for your phone by selling it at an electronics store.


Best Buy store sign at night
Electronics stores such as Best Buy will buy used cell phones for cash
Image Source: Dr. Penny Pincher


Ship your Cell Phone to a Buyback Service

There are a number of buyback services that will buy your used cell phone by mail.  Here’s how it works:
  1. On the website, enter the make, model, and condition of you phone to get an estimate.
  2. If you are satisfied with the estimated price for your phone, ship your phone to the buyback service
  3. The buyback service receives your phone and evaluates it
  4. You payment is issued


Many cell phone buyback services offer free shipping if your phone value is over a certain amount.

Some popular cell phone buyback services to consider:
Best Buy mail service: http://www.bestbuytradein.com
buymytronics (part of GameStop network): http://www.buymytronics.com/Sell-Cell-Phone

An advantage of using buyback services is that you can quickly check offers for your phone on websites and pick the best offer.  However, it may take a couple weeks to ship your phone, have it evaluated, and receive your payment.  If you are looking for fast cash, you'll want to consider another method.

I checked out the value of my 2 year old BlackBerry Torch 9800 (AT&T).  I expected the value to be around $100.  The phone is in good working condition and has no water damage.  Here are the offers I received to buy my used cell phone:
  • Gazelle: $40
  • Best buy trade-in: $70
  • uSell: $27
  • recellular: $61
  • buymytronics: $50
  • casholdphone: $85

As you can see, there is a big difference in the value of a used cell phone depending on which buyback service you get an offer from- it pays to look at multiple offers and pick one of the best offers.  

I took my phone to the ecoATM at the local shopping mall.  ecoATM examined the BlackBerry and gave me a generous offer of.... $36.  I declined the offer from ecoATM since I should be able to get $70 at the Best Buy store if the offer at the store is the same as from the Best Buy on-line service.  However, I learned that the offer from Best Buy is for store credit at Best Buy- not cash.

I checked out the highest cash offer from casholdphone again.  I found that Casholdphone received an F rating from BBB and has complaints listed.  Maybe a $70 gift card at Best Buy is the best of these deals after all... 

After considering my offers, I decided to sell my BlackBerry myself on eBay.  This brings us to another way to get cash for your phone.

Sell you old cell phone yourself on craigslist, eBay, etc. and get cash

You might be able to get the most money for your cell phone if you’re willing to sell it yourself.  However, selling your phone yourself is a lot more work than selling it to a buyback service.  You'll want to check the market price for your cell phone on a couple of the buyback service websites above.  For it to be worth the effort, you'll want to set the asking price higher that the offers from buyback services.

One drawback of selling the phone yourself is that there is no way to predict how long it will take to sell.  It could sell in a day, or it may take one week, or it may take longer.  

If you sell on a eBay auction, you will know when the auction ends, but you will not know if you will get any bids.  If you offer a Buy It Now option, your phone could sell at any time.  Check some listings for phones of the same model and condition that you are selling to get an idea of the market price.  You will be able to see how high the bidding has gone on auctions that are near the ending time.

I ended up listing my BlackBerry with wall charger and USB cable on eBay with a starting price of $51 and Buy It Now price of $100.  The phone sold within 2 hours for $100.  eBay turned out to be a good way to sell the phone myself.  The payment was received through PayPal and was very easy- the money just showed up in my account.  I printed my own shipping labels through eBay and dropped the package off at the post office.


Penny Pinching Tips:
  • Get at least a couple offers for your used cell phone to consider.  Check offers from mail-in buyback services on their websites so you can compare offers.
  • The convenience of getting instant payment makes selling your cell phone at a local store or ecoATM kiosk appealing.
  • If you have a relatively new phone, or a popular model, you may be able to sell it yourself on craigslist or eBay and get the most money for your phone.  But it will take some work to advertise your phone.  With craigslist you'll need to meet with buyers to close the deal.  With eBay, you'll need to pack and ship your phone.
  • My pick if you're getting a new phone: get a Droid RAZR M free


Recommended reading:


Penny Pincher Journal
Copyright © 2013 Dr. Penny Pincher.  All Rights Reserved.  Privacy Policy


Saturday, May 4, 2013

Garage Sale Tips- Buying Bargains and Selling Secrets


Learn how to find garage sale bargains as a buyer, and how to have a successful garage sale as a seller.  How to make effective garage sale signs.

Garage Sale Bargains- Buying at Garage Sales

Printed garage sale sign with address and days of sale written in marker
Garage sale sign shows address,days of sale, and directional indicator
Image Source: Dr. Penny Pincher

Garage Sales

Garage sales are an opportunity for the seller to get rid of unneeded items and pick up some money.  The seller doesn’t need to transport any of the items- people will buy them and take them away.  For buyers, garage sales provide an opportunity to get useful items at a very low price.  For some sellers, the primary purpose of holding a garage sale it to get rid of items, so the prices can be very low.  Many garage sales have tables of items that are priced at a few dollars, or boxes of items for a few dollars.  Some garage sales even have free items available for anyone to take.

Yard Sales, Tag Sales, Moving Sales, Estate Sales, and Auctions

Related types of sales that provide opportunities for bargain hunting are yard sales, tag sales, moving sales, estate sales, and auctions.

A yard sale is simply a garage sale without the garage.  Items for sale may be displayed on someone’s yard rather than in a garage and on the driveway.

A tag sale usually includes higher quality items such as furniture, antiques and collectibles that are individually marked with prices.

A moving sale is similar to a garage sale, but is specifically triggered by someone moving and wanting or needing to sell items to avoid moving or storing them.  A moving sale signals some desperation on the part of the seller since time is limited.  Buyers may be able to have more bargaining power at moving sales.

Estate sales indicate that someone’s household items are being sold due to death, retirement, etc.  Items for sale at an estate sale typically include most if not all belongings of the owner.  The quality of items at an estate sale varies, but is often similar to a tag sale with many valuable items for sale.

An auction is a means of selling where none of the items for sale are priced.   The auctioneer takes bids for items individually by calling out prices.  When someone bids on an item, the auctioneer increases the price and continues taking bids.  When no more bids are forthcoming, the auction announces “sold!” and moves on to the next item.  Thus each item is sold to the highest bidder.  An auction can be held on the seller’s property or at an auction house.

How to find great deals at garage sales

What Bargain Items are Sold at Garage Sales


There are two categories of bargain items you can find at garage sales:

  1. Things you need and will use and can get for a very low price
  2. Things you can resell for more on craigslist, eBay or at your own garage sale

Top Bargain items to look for at garage sales:
  • Bikes: especially name brand, kids or adult
  • Tools: hand tools or power tools
  • Tricycles for kids
  • Leather clothes: especially leather jackets
  • Antiques
  • Musical instruments
  • Unique art items for decorating
  • Used hardcover books, a good price is $2 or less- if not moldy
  • Used CDs, DVDs and video game discs, a good price is $2 or less- if not scratched
  • Working video game systems, a good price is $30
  • High quality kids toys
  • Wagons
  • Collectibles/collections
  • Sporting goods: golf clubs, exercise equipment in good working order

Watch out for:
  • Outdated electronics
  • Broken items or items in need of repair
  • Things you don't really need and can’t sell for a profit

Finding Good Garage Sales and Getting the Good Items

Garage sales that are selling high quality or valuable items are not usually a well kept secret.  These will be advertised on craigslist, in the local newspaper classifieds, or both.  Saturday is the prime day for garage sales, and Saturday morning is the peak time.  You can drive through neighborhoods on most Saturdays during garage sale season and find garage sale signs to follow.

Some sale advertisements and signs indicate that early birds are welcome or that early birds are not welcome.  Early birds are shoppers that arrive at a sale before it officially opens and attempt to snap up the best bargains.  It pays to be one of the first to arrive at a garage sale to have the best chance to find great deals.  If the ad doesn't say that early birds are not welcome and there is an item you are interested in, it can’t hurt to show up a bit early to check it out.

Negotiating the Price

Prices at garage sales are usually flexible, especially as the end time of the garage sale approaches.  Getting 10% to 20% off of the listed prices is pretty common for most items.  Offering to take multiple items can help obtain discounts from the seller, since one goal of the seller is to get rid of items they don’t want anymore.


Here's a guide to finding buying bargains at garage sales and selling them for a profit on eBay...


How to Have a Successful Garage Sale- Tips to Sell Your Items and Make Money

When to Schedule Your Garage Sale

The prime season for garage sales is May through September, with spring and early summer being the most active times.  Saturday is the prime day, with Saturday morning the busiest hours.  Some people start their garage sale on Friday afternoon or even on sell on Thursday afternoon, Friday afternoon, and then all day Saturday.  I prefer to focus my effort on a single day rather than spreading the sale out over multiple days.

How to Advertise Your Garage Sale

You’ll want your advertising for your garage sale to appear starting at least one day before your sale to give potential buyers a chance to take note and make plans to attend.  Some people study garage sale ads carefully and plan their weekends around hitting the best ones.   You want to make sure you get on their list.

More casual garage sale shoppers will check the newspaper classified ads or look on craigslist the morning of the sale.  If you advertise on craigslist, you’ll want to make sure your listing appears on the day of the sale, you can renew it and get it posted on the top of the list.

Another highly effective advertising technique is to mention your sale to neighbors starting a couple weeks ahead of time.  Some of your neighbors may be interested in your items, and they’ll spread the word to others as well.

When advertising your garage sale, it helps to be able to mention a few headline items.  If you say you are selling old clothes, paperback books, and VHS tapes, you probably won’t draw a big crowd.  It can bring people to check out your sale if you have a few interesting things to list such as antiques, vintage items, collectables, tools, etc.  Your goal in writing the ad is to make your sale sound promising enough to merit a trip.

Effective Garage Sale Signs

Many garage sale shoppers simply see garage sale signs while driving and spontaneously decide to stop.  You’ll want to place signs the day before- this will also cause some people to make plans to attend your sale.  Effective garage sale signs provide a date, address, and a directional cue and are posted along main roadways.  Signage with this information will have the best chance of convincing someone driving along that your sale is for real and that they can find it.  Some people use balloons or large signs to draw attention.

Buy a Garage Sale Kit- or Make Your Own

You can buy a garage sale kit that includes garage sale signs and price stickers (both blank and with printed with popular price amounts) at discount stores, hardware stores, and home improvement stores for less than $10.  If you want to save a few bucks, you can make your own cardboard garage sale signs for free and get blank stickers at an office store or dollar store for about $2.  Another option: get a cheap garage sale kit on eBay

Cardboard sign with "Sale" in large black letters and green directional arrow
Homemade Garage Sale Directional Sign
Image Source: Dr. Penny Pincher

Organizing Your Garage Sale

Prices

You’ll need to decide prices for your items.  This is sometimes easier said than done.  How much is a set of old golf clubs worth?  Some items may take a bit of research on eBay to set reasonable market prices.  You’ll want to mark the items with price stickers.    Consignment shops often do not accept items with garage sale price tags, so you may want to use boxes labeled with a common price for multiple items, or have a $5 table where any item on the table is $5.  This will save you the trouble of removing price stickers if you end up selling items at a consignment shop.

If you have fairly expensive items, such as over $100, it is useful to print out listings from eBay for similar items to help buyers accept your price.  Of course they won’t have to pay shipping if they buy it from you rather than on eBay.

Firm Prices or Negotiate Prices?

Are you willing to bargain on prices?  Many garage sale shoppers expect to get items for lower than asking price.  Expect offers 10 to 20% lower than asking price.  It is a good idea to set prices with a bit of room to negotiate- this will make it easier for you to close the deal with buyers.

Let’s say you have an item marked $4.50, someone offers you $4.00 and you decline and say that prices are firm.  That potential buyer may very well walk away.

Now let’s consider this transaction again with slightly different pricing that facilitates negotiation.  This time let's say you mark the same item at $5, someone offers you $4.00 and then you then suggest $4.50.  You’ll probably sell the item for $4.50 just like you wanted.  Everyone’s happy.  Leaving some room in the price to negotiate can help you reach a deal with buyers.

Garage Sale Preparation and Setup

Use display tables to arrange your small items, and arrange your larger items in your driveway or garage.  Displaying your items in a neat and organized fashion serves two purposes:
  1. It will attract buyers to your sale.  People often drive buy before stopping to decide if a garage sale is worth stopping for or not.  You’ll want people driving by to see that you have some quality items for sale and that they will be able to easily look through what you have if they stop.
  2. It will help you sell more.  If buyers can quickly see what you have, you’ll sell more

Cash or Checks?

You’ll need to decide whether or not to accept personal checks.  The risk of accepting a personal check is that it might bounce and you may never get the money.  The risk of not accepting personal checks is you may loose a few sales if a potential buyer has checks with them but not cash.  Also, it would be awkward to refuse a personal check from a neighbor.  Whether you are taking checks or not, some people will buy with cash.  Don’t forget to have some change on hand for cash transactions- small bills and coins.


Early Birds Welcome or Not?

You’ll need to decide whether to welcome early birds or not.  At my first garage sale a number of years ago, the doorbell rang an hour before starting time.  An early bird wanted to look at my coke machine that was for sale.  I was asking $125 and he offered $100 which I accepted.  At starting time, another buyer asked about the coke machine.  He was upset when I told him that it was already sold.

My advice would be to add “no early birds, please” to your garage sale advertisements.  This makes it clear to everyone what to expect.  Also, I think I could have sold the coke machine for the full $125 asking price if I would have waited…

How to Handle Rain on Garage Sale Day?

Since you don’t want your items to get wet, you have two options:   move the sale inside or take down your signs and postpone your garage sale to a different date.  If you have room in your garage or in your basement, you can proceed with your sale inside.  If the forecast is for rain all day, I would postpone since many buyers will stay home and you’ll sell more if you postpone.


Garage with door open and items for sale inside
This garage sale was forced inside due to rain- displaying items outside would attract more traffic
Image Source: Dr. Penny Pincher

What to Do with Items That Don’t Sell

It’s likely that not everything you want to sell at your garage sale will be sold.  Depending on what is left over, you could take the items to Goodwill for donation or take the items to a consignment store to sell.  If you have enough items left, you could plan to hold another garage sale.  You could sell some of the items on eBay- this will present your items to a larger audience.  Another options is to take unsold items to a local auction house to be sold.  After considering all of these options, there may be some items that you’ll need to throw away if you want to get rid of them.

How Much Money Can You Make at a Garage Sale?

Of course the amount of money you can make at a garage sale depends on what you have to sell and how many buyers turn out.  I have made hundreds of dollars at a 4 hour garage sale, and know people who have made over $1000 at a garage sale.  You can’t really control what items you have available to sell, but you can influence how many buyers show up through your advertising and preparation.  You have some influence over selling price as well though how you set the asking prices and how you negotiate.  Focus on the things you can control to have a successful garage sale!


Recommended Reading:


Copyright © 2013 Dr. Penny Pincher.  All Rights Reserved.  Privacy Policy

Friday, May 3, 2013

ElliptiGO vs StreetStrider- Find the Best Elliptical Bike

Elliptical Exercise Machines Let You Train and Ride

Three ElliptiGO elliptical cycles on a sidewalk
ElliptiGO- hybrid of bicycle and elliptical trainer
Image Source: Dr. Penny Pincher


One problem with exercise equipment is that people quickly lose interest.  Workouts can become boring.  Treadmill machines often include a video screen so that you can watch TV or even simulated scenery as you exercise to help hold your interest.  Some stationary bikes include a video screen and resistance control to simulate riding a specific route, making the workout more interesting.  ElliptiGO and StreetStrider take your workout to an entirely new place- moving down the street on an elliptical exerciser.  Which is the best elliptical cycle?

ElliptiGO Elliptical Bicycle

ElliptiGO is an elliptical exercise machine with wheels that actually moves while you are exercising.   Like an elliptical exerciser, you use the ElliptiGO in an upright, standing position.  Riding around on an ElliptiGO would attract some attention- this is an unusual looking machine.  It sort of reminds me of an elongated Segway HT with elliptical pedals.

ElliptiGO is a cross between bicycle and elliptical exerciser.  It has brakes activated by hand levers similar to brakes on a mountain bike.  ElliptiGO uses handle bars for steering and has gears to make climbing hills easier.  You can get 3, 8, or 11 speeds depending on the ElliptiGO model you choose.  If you plan to ride on hills, the 8 and 11 speed models are recommended.

ElliptiGO is designed to provides a serious cardiovascular workout as well as an interesting riding experience.  Most people interested in ElliptiGO are focused on getting intense exercise and finding an alternative to running.  Since ElliptiGO works like an elliptical exercise machine, it is easier on feet, knees, and hips than running.

Since ElliptiGO has 2 wheels, you'll need to balance it, similar to riding a bicycle or scooter.  The standing position while riding an ElliptiGO allows you to use your whole body to propel you up hills- sort of like standing up while riding a bicycle to climb a steep hill.  Weighing in at about 40 pounds, ElliptiGO is fairly heavy compared with road bikes.  ElliptiGO can reach speeds of 15-25 mph.

You can use ElliptiGO with a stationary trainer- this allows you to use ElliptiGO indoors during winter months as a traditional elliptical trainer.

ElliptiGO models are priced ranging from about $1799 - $3000, depending on model.
ElliptiGO models include the 11R, 8C, and 3C.
Manufacturer website: http://www.elliptigo.com/

StreetStrider Elliptical Cycle


Red StreetStrider on a stand in a living room with woman exercising
StreetStrider- hybrid of cross-country ski machine and tricycle
Image Courtesy of FitnessFreakLA by CC-SA3.0

StreetStrider provides a cross country ski machine workout on a stand-up trike.  StreetStrider has 2 wheels in front and one rear wheel.  The 3 wheel design virtually eliminates the need to balance, and you can come to a complete stop without putting your feet down.

Unlike ElliptiGO, you pump your arms in addition to your legs to propel StreetStrider.  But how do you steer StreetStrider?  The answer is lean to steer.  You shift your body weight to the left or right to make StreetStrider turn.  That way you can keep pumping your arms, even in turns.


StreetStrider weighs about 50 pounds, about 10 pounds more than ElliptiGO.  Gear options include a 3 speed model (Sprinter 3r) and an 8 speed model (Summit 8r).  Like ElliptiGO, you can use StreetStrider with a stationary trainer for indoor workouts as shown in the picture above.


The StreetStrider 8 speed model is priced starting at about $1800.
Manufacturer website:  http://www.streetstrider.com/


A Zike step cycle looks like an interesting low-cost alternative to ElliptiGO or StreetStrider at around $500:

ElliptiGO vs StreerStrider: Which is the Best Elliptical Bike?
  • These elliptical exercise cycles both look like a lot of fun and would be great for people who are looking for lower impact exercise than running
  • If you are looking for an alternative to riding a bicycle for exercise, elliptical cycles are worth considering:
    • A bicycle requires a seated, hunched over posture  
    • Recumbent bikes or recumbent trikes require a reclined posture  
    • Elliptical exercise cycles use a standing up posture
  • With a stationary trainer, these can be used year-round indoors or outdoors.
  • As with any exercise equipment the key question is- would you really use it?  The ability to ride it like a bicycle seems like a nice feature.
  • These cycles are fairly expensive.  You could get really lucky and find one of these at a garage sale cheap.
  • You could check craigslist for a used one.  These are fairly unique, so the market for used ones may be limited, creating an opportunity to drive a bargain (maybe).
  • Look for the best elliptical bike deals on eBay:


Recommended Reading
Copyright © 2013 Dr. Penny Pincher.  All Rights Reserved.  Privacy Policy


Ceiling Fan Direction: Which direction should your ceiling fan rotate in summer and winter to save you money?

Ceiling Fan Direction- Set your Ceiling Fan to Rotate in the Right Direction

Display of a variety of ceiling fans
Most Ceiling Fans are Reversible for Summer and Winter
Image Source: Dr. Penny Pincher


Most ceiling fans can reverse direction.  This means that the fan can rotate either clockwise or counterclockwise when you are viewing it from below.  Your ceiling fan can help keep you more comfortable in winter by circulating warm air throughout your living area, reducing heating costs.  In summer, your ceiling fan can help cool you with moving air to create a windchill effect, keeping you cooler and saving money on air conditioning costs.

The cost to operate a ceiling fan is much lower than the cost to operate an air conditioner or furnace.  Using a ceiling fan properly can keep you comfortable at a higher thermostat setting in the summer or at a cooler thermostat setting in the winter, saving you money on heating and cooling costs.

It is not obvious by looking to determine the correct direction for a ceiling fan to rotate in summer and in winter.  I think it would be useful if the switch to reverse direction was somehow labeled to indicate the summer position and the winter position, but I have never seen one labeled.  Which way should your ceiling fan rotate?

Which direction should your ceiling fan rotate in summer and winter?  

Summer Ceiling Fan Direction

In summer, a ceiling fan should rotate counterclockwise when viewed from below.  The fan should turn so that the up-turned edge of the blade is leading.  This results in air being pushed down directly under the fan.  This ceiling fan direction provides the most cooling effect from moving air.

Winter Ceiling Fan Direction

In winter, the ceiling fan should turn clockwise when viewed from underneath so that downward turned edge of the fan blade is leading.  This results in air being pulled up toward the ceiling fan.  This will mix cooler air from near the floor with warmer air near the ceiling and circulate it throughout your living space.

Wrong Ceiling Fan Direction

Even if your ceiling fan is turning the wrong direction, you can still get some climate control benefit.  In winter, if your ceiling fan is turning in the summer direction, it will still circulate air and help move the warm air near the ceiling down to where you will feel it.  The downside is that you will feel the moving air from the ceiling fan and this may make you feel cooler.  In summer, if your ceiling fan is turning in the wrong direction you will not get the windchill effect under the fan, but moving air will help somewhat with cooling especially near the walls in the room where the ceiling fan is located.

How to reverse the rotation of your ceiling fan

Switch in Plain Sight

Most, but not all ceiling fans are reversible.  If your ceiling fan is reversible the most likely way to control the rotation direction is a switch on the outside of the fan.  The picture below shows the most common style and location of switch to reverse the ceiling fan direction.  Many switches are not labeled, but a switch like this on a ceiling fan is likely to control the blade direction.


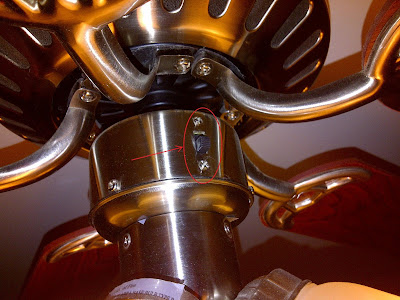
Ceiling fan reverse direction switch is circled- this one can be seen easily
Ceiling Fan Reverse Direction Switch- this one is easily visible
Image Source: Dr. Penny Pincher

Where to find the Hidden Ceiling Fan Switch

How do you reverse the direction of your ceiling fan if there is no switch?  In some ceiling fans, the switch to change the direction of rotation is located on top of the fan.  This can be confusing- there are lots of questions posted on the internet by people looking for the reverse switch on their ceiling fan.  If you can’t see it standing under your ceiling fan, you may need to stand on a chair or use  a ladder to locate the switch on top.  The picture below shows a rotation direction switch on top of a ceiling fan.  There is no way to see this switch when standing below the fan.  The model shown is a Harbor Breeze Wakefield.  Other models have reverse switches on top as well.

Ceiling fan with no apparent way to reverse the fan direction
No reverse direction switch is visible on this ceiling fan- how do you reverse the direction?
Image Source: Dr. Penny Pincher


The reverse direction switch is on top of some ceiling fan models
The reverse direction switch is hidden on top!
Image Source: Dr. Penny Pincher

Remote Control

Another way to change the rotation direction of a ceiling fan is using the remote control.  If your ceiling fan has a remote control, there may be a combination of buttons on the remote that can be pressed to reverse the fan direction.  If this is not labeled on your remote control, you will need to search for a manual to determine the correct buttons to change the fan direction using the remote control.  It may be easier to use the switch on the fan itself rather than using the remote control.


Recommended Reading


Copyright © 2013 Dr. Penny Pincher.  All Rights Reserved.  Privacy Policy

Saturday, April 27, 2013

Sharpen Disposable Razor Blades and Save Money

Expensive Razor Blades


Sharpen Razor Blades, Save Money!
Image Source: Dr. Penny Pincher
Store display of Gillette Fusion razor blades, one box is priced at over $40 for 12 razor blades
Disposable razor blades are expensive
Image Source: Dr. Penny Pincher

Disposable razor blades are expensive!  I use a Gillette Fusion razor which uses a disposable razor cartridge with 5 blades.  Since my wife usually picks up razor blades for me, I had no idea how expensive they are.  The Gillette Fusion razor costs about $10 and comes with two disposable blade cartridges.  Packs of 4 razor blade cartridges cost about $16- this is $4 for each disposable razor blade.  So the old expression "give away the razor and sell the razor blades" is almost true in this case.  I would estimate that a razor blade cartridge lasts 3 or 4 weeks.  At this rate I would use 14 per year which adds up to $56 over one year.

Razor blades are made of steel- the Fusion actually has 5 blades.  Shick Hydro is a similar multi-blade razor product in this category.  It seems like something made of steel should be able to last longer than a few weeks against my beard.  It seems wrong to throw away something so expensive after such a short time.  Can you sharpen disposable razor blades?

Sharpening Disposable Razor Blades

After some research, I think I have come up with a way to make disposable razor blades last much longer.  You can find videos on the internet that show how to sharpen a razor blade using denim blue jeans.  The technique shown in the video is to push the razor along the jean with the blades facing backward.  My initial impression was that this is nonsense.  Cotton is much softer than steel (and much softer than whiskers even) and it does not seem possible that a soft material like cotton could sharpen steel.  The process of sharpening a blade requires some of the metal from the blade to be worn away to hone the edge and make it sharp.  Blue jeans are simply not a viable way to actually sharpen a razor.

After further reading and actually testing this technique, I think that the blue jean sharpening technique works- but not by sharpening the blades.  The process of rubbing the blades against the blue jeans is similar the rubbing a straight razor on a piece of leather to sharpen it.  This method of sharpening is known as stropping.  Rubbing the blade against leather straightens out the edge of the blade and thoroughly cleans and dries it.  This is the beneficial effect that you can get using denim to "sharpen" a disposable razor blade.  The primary reason that disposable razor blades get dull is that they get build-up of dried shaving cream residue and mineral deposits.  They can also get some rust on the surface since most people put them away damp.  Rubbing the blade along denim after shaving cleans, dries, and straightens out the blades and keeps them in new condition much longer.

Close-up of sharp disposable razor blade with microscope in background
Sharp disposable razor blade- no mineral deposits, dired shaving cream residue, or surface rust to dull the blade
Image Source: Dr. Penny Pincher

Better than the Blue Jean Sharpening Technique


My mind kept going back to the image of a barber rubbing an old fashioned straight blade against a leather strap to clean and sharpen it.  I don't want to keep a pair of jeans or even a piece of denim in my bathroom.  It would get wet and dirty.  What do I have that is more like leather?  Conveniently, skin is a lot like leather.

I tried this sharpening technique and it works great- rub the razor along your forearm from your elbow to your wrist.  Press the razor so it is in contact with skin- make sure the sharp part is facing opposite to the direction you are moving the blade.  In other words, run it backward along your arm so the blades will not cut you.  You will see that the razor blades looks clean and shiny after doing this about 20 times.  Next, I run the razor in this same backward direction along a towel to make sure it is really dry before putting it away.  My razor has stayed noticeably sharper by doing this.


Picture shows how to sharpen disposable razor blade by pushing along arm
Improvised leather strop sharpening technique for disposable razor blades.
Run the razor from near your elbow toward your wrist in the direction shown.
Image Source: Dr. Penny Pincher


I think mineral deposits, hardened shaving cream residue, and surface rust cause most of the dulling effect of disposable razor blades.  Keep your blades clean and dry and they will stay sharp much longer.  I was amazed how well this works- give it a try and save money on expensive disposable razor blades.


Recommended Reading:
K-cup cost: Is it expensive to make coffee with a Keurig Coffee Maker?

Use a Cheap USB Flash Memory Stick to Speed up Windows 7


Copyright © 2013 Dr. Penny Pincher.  All Rights Reserved.  Privacy Policy


How Long Does It Take To Walk X Miles or X kilometers?

How Long Does It Take To Walk...


Man and Woman hurrying along road,  woman is looking at watch.
How long does it take to walk 1 mile?
Image courtesy of Ken Morrill CC-BY-2.0


The time it takes to walk a given distance depends on your walking speed.  Evaluation of walking speed determined the following typical walking speeds on a paved surface:

  • Leisurely walking speed is 3.14 mph or 5.06 km/hr.  This is approximately the average human walking speed.
  • Normal/purposeful walking speed is 4.22 mph or 6.80 km/hr
  • Brisk walking speed is 5.88 mph or 9.47 km/hr
The brisk walking speed is walking nearly as fast as possible- it would take excellent physical conditioning to sustain this pace for very long.  Normal or leisurely walking speeds could be sustained for a long time with little or no special conditioning.  The walking conditions will also impact walking speed: walking uphill or walking in bad weather is likely to be slower.  The walking speeds considered are based on walking on a paved, level surface.

Walking Time Calculator

Use the Walking Time calculator below to check walking time for any distance:
  • Enter the units you would like to use: miles, kilometers, or blocks
  • Enter your walking speed: leisurely, purposeful, or brisk
  • Enter the walking distance
  • Click 'Compute'
  • Results show how long it would take to walk the selected distance in seconds, minutes, and hours


Walking Time Calculator by Dr. Penny Pincher
Copyright (c) 2014. All Rights Reserved
http://pennypincherjournal.blogspot.com
Units:
Miles
Kilometers
Blocks (650 feet)
Walking Speed:
Leisurely (3.1 mph/5.1 km/hr)
Purposeful (4.2 mph/6.8 km/hr)
Brisk (5.9mph/9.5 km/hr)
Enter distance to Walk:

Result: Time to Walk= seconds
Result: Time to Walk= minutes
Result: Time to Walk= hours

* Remember to push the "Compute" button to update the result when you change units, walking speed, or distance!


For reference, the tables below show how long it would take to walk the given distance at each of the 3 walking speeds considered.  Note that the times provided do not include any breaks or rest stops and assumes that a steady walking pace is maintained.

Look up the walking time for a given distance in miles or kilometers below.  Walking time for distance in miles is given first, followed by kilometers (km).  Sometimes km is abbreviated simply as k, for example a 5k walk is 5km or about 3 miles.

How Long Does it Take to Walk 1 Mile?

One mile is a fairly short walk- you may be able to reach a local school or grocery store from your home with a one mile walk each way.

Leisurely walking speed: 19.1 minutes
Normal walking speed: 14.2 minutes
Brisk walking speed: 10.2 minutes

How Long Does it Take to Walk 2 Miles?

A two mile walk is no problem for most people.  If you live in town, you can likely reach many schools and businesses with a 2 mile walk each way.

Leisurely walking speed: 38.2 minutes
Normal walking speed: 28.4 minutes
Brisk walking speed: 20.4 minutes

How Long Does it Take to Walk 3 Miles?

A 3 mile walk is something you can easily accomplish during a 1 hour lunch break.

Leisurely walking speed: 58.1 minutes
Normal walking speed: 42.9 minutes
Brisk walking speed: 30.5 minutes

How Long Does it Take to Walk 4 Miles?

Walking 4 miles may also be achievable during a lunch break if you are in good shape and have good walking conditions (good weather and flat walking surface).

Leisurely walking speed: 77.4 minutes
Normal walking speed: 57.1 minutes
Brisk walking speed: 40.7 minutes

How Long Does it Take to Walk 5 Miles?

Walking five miles is more of a commitment.  You can walk across most small and medium size towns with a 5 mile walk each way.

Leisurely walking speed: 95.5 minutes
Normal walking speed: 71.0 minutes
Brisk walking speed: 51.0 minutes

How Long Does it Take to Walk 10 Miles?

If you are stranded on the highway between towns, you might need to walk 10 miles to reach the next town.

Leisurely walking speed: 3.18 hours
Normal walking speed: 2.37 hours
Brisk walking speed: 1.70 hours

How Long Does it Take to Walk 100 Miles?

Walking one hundred miles without a break would be a long day- it would take about 24 hours at normal walking speed.

Leisurely walking speed: 31.8 hours
Normal walking speed: 23.7 hours
Brisk walking speed: 17.0 hours

How Long Does it Take to Walk 1 km (kilometer)?

One kilometer is a short walk- a few city blocks in most areas.

Leisurely walking speed: 11.9 minutes
Normal walking speed: 8.80 minutes
Brisk walking speed: 6.34 minutes

How Long Does it Take to Walk 2 km (kilometers)?

A distance of two kilometers is a bit more than one mile, also a short walk for most people.

Leisurely walking speed: 23.7 minutes
Normal walking speed: 17.6 minutes
Brisk walking speed: 12.7 minutes

How Long Does it Take to Walk 3 km (kilometers)?

You could walk 3 km during a 30 minute lunch break.

Leisurely walking speed: 36.1 minutes
Normal walking speed: 26.6 minutes
Brisk walking speed: 19.0 minutes

How Long Does it Take to Walk 4 km (kilometers)?

If you are not ready to tackle a 4 mile walk, start with a 4 km walk.  It sounds almost as impressive!

Leisurely walking speed: 48.1 minutes
Normal walking speed: 35.5 minutes
Brisk walking speed: 25.3 minutes

How Long Does it Take to Walk 5 km (kilometers)?

A five kilometer distance is equivalent to about 3 miles.  Most people can easily walk this distance.  A 5 km walk is also known as a 5 k walk.

Leisurely walking speed: 59.3 minutes
Normal walking speed: 44.1 minutes
Brisk walking speed: 31.7 minutes

How Long Does it Take to Walk 10 km (kilometers)?

Ten kilometers is over 6 miles.  Walking this distance would take you across town in most small and medium sized cities.  At over an hour and a half at normal walking speed, a 10 k walk takes some commitment.

Leisurely walking speed: 1.98 hours
Normal walking speed: 1.47 hours
Brisk walking speed: 63.4 minutes

How Long Does it Take to Walk 100 km (kilometer)?

One hundred kilometers is a bit over 62 miles.  Walking 100 km would be a long day or night, taking over 12 hours to cover this distance.

Leisurely walking speed: 19.8 hours
Normal walking speed: 14.7 hours
Brisk walking speed: 10.6 hours


Recommended Reading:


Copyright © 2013 Dr. Penny Pincher.  All Rights Reserved.  Privacy Policy

Recent Penny Pincher Posts